


You all know I'm not a baker, but sometimes I like to make something sweet, especially when it's our turn to bring food for fellowship at church. FoodBuzz was having a promotion sponsored by COOL WHIP Whipped Topping, so I signed up knowing the due date corresponded with our next turn for fellowship. I'd had my eye on this Chocolate Chip Cookie Delight for awhile now, so this was the perfect chance to make it. 
I baked the cookie crust and assembled the rest of the dessert Saturday morning so it would be ready for Sunday morning. I did sneak a taste Saturday night so I could take photos and make sure it tasted OK before bringing it to church. It was delicious. The crunchy cookie on the bottom and the creamy pudding was a great texture contrast, but my favorite layer was the cream cheese, sugar and COOL WHIP. We didn't eat COOL WHIP growing up, so this was my first experience baking with it.
This was a big hit at church and the leftovers went with SP to work, where I hear it was devoured within minutes. This would be a great dessert for a potluck event. Thanks to FoodBuzz and KRAFT for this opportunity.
Chocolate Chip Cookie Delight
Taste of Home
1 tube (16-1/2 ounces) refrigerated chocolate chip cookie dough
1 package (8 ounces) cream cheese, softened
1 cup confectioners' sugar
1 carton (12 ounces) COOL WHIP Whipped Topping, thawed, divided
3 cups cold milk
1 package (3.9 ounces) instant chocolate pudding mix
1 package (3.4 ounces) instant vanilla pudding mix
Chopped nuts and chocolate curls, optional
Let cookie dough stand at room temperature for 10 minutes to soften. Press into an ungreased 13-in. x 9-in. baking pan. You will need to press into a thin layer to make the dough stretch to all four corners. Bake at 350° for 14-16 minutes or until golden brown. Cool on a wire rack.
In a large bowl, beat cream cheese and confectioners' sugar until smooth. Fold in 1-3/4 cups COOL WHIP Whipped Topping. Spread over crust.
In a large bowl, whisk milk and pudding mixes for 2 minutes. Spread over cream cheese layer. Top with remaining whipped topping. Sprinkle with nuts and chocolate curls, if desired.
Cover and refrigerate for 8 hours or overnight until firm. Yield: 15 servings.
As part of the Foodbuzz Tastemaker Program, I received coupons for free COOL WHIP Whipped Topping and a stipend. Sponsored posts are purely editorial content that we are pleased to have presented by a participating sponsor. Advertisers do not produce the content. What you add makes it. #coolwhipmoms

FoodBuzz: Chocolate Chip Cookie Delight


Recipe Swap - Lemon-Basil Blueberry Muffin Top Cookies
Want to see what other Fruit recipes were made during the swap? Here is the link to the Fruit Recipe Swap Roundup
Now that spring is here and we're starting to see more fruit in the supermarket I thought fruit would be a great theme for the recipe swap. I submitted a savory recipe (my favorite Thai Pineapple Rice) but many of the participants chose sweet recipes, like this one for Lemon-Basil Blueberry Muffin Top Cookies from my friend Jessica over at The Jey of Cooking. 
Jey couldn't stop raving about these cookies when she sent me the link for the swap and when I read her blog post I got even more excited about making them. I loved the idea of the basil mixed with the lemon and blueberry. And muffin tops are my favorite part of the muffin so I knew these would be a hit. I had some basil leftover from my Weeknight Spaghetti and Meatballs, so I decided to make these immediately. 
I let Baby Girl have half a cookie as she watched me take these photos and she absolutely loved them. She rarely has cookies (this kid does NOT handle sugar well), but I was impressed that she enjoyed all the complex flavors. These are certainly not your traditional cookies. I also brought about half the batch to church on Sunday since we had signed up to bring food for fellowship after the service. They were a big hit and someone even asked me for the recipe. Yay! 
I'll definitely be making these again over the summer when my basil plant gets out of control. Jey's original recipe listed 3 large basil leaves but that alone only yielded 1 tablespoon when chopped, so I used the rest of the plant (about 1/4 cup total) and that was perfect.
Make these soon and you won't be sorry!
Lemon-Basil Blueberry Muffin Top Cookies
The Jey of Cooking
1 1/2 cups flour
1/4 teaspoon baking soda
1/4 teaspoon salt
3/4 cup sugar
Zest of 2 lemons, 1 1/2 tablespoons reserved
1/4 cup fresh basil, finely chopped, 1 tablespoon reserved
6 tablespoons unsalted butter, at room temperature
1 egg
1/2 teaspoon vanilla
1/3 cup buttermilk*
1 cup blueberries
Confectioner’s sugar (powdered sugar)
Juice from about 1/2 lemon
Preheat oven to 350. Line 2 baking sheets with parchment paper.
Combine flour, baking soda and salt in a medium bowl. Add sugar, lemon zest and basil to a small food processor and pulse to combine.
Beat the butter, in a stand mixer or a regular bowl using a hand mixer, until creamy. Add the sugar mixture and beat again until fluffy. Add the egg and vanilla, then turn the mixer down to low. Slowly add in the flour mixture and buttermilk, alternating in batches beginning with 1/3 of the flour, then 1/2 of the buttermilk, 1/3 of the flour, the other half of the buttermilk, then the rest of the flour. Scrape down the sides of the bowl as needed. Fold in blueberries.
Using a cookie scoop or a leveled tablespoon, drop dough onto the baking sheet, leaving about 1 1/2 inches between cookies.
Bake each sheet for 12 minutes. Cool for 2 minutes, then transfer to a cookie rack.
Whisk together confectioner’s sugar (about 1/2 cup), lemon juice and reserved lemon zest and basil until you reach your desired consistency and flavor. Drizzle on top of the cookies. Allow to cool completely and the glaze to harden before serving.
* To make you own buttermilk, put 1 tablespoon of white vinegar or lemon juice into a glass measuring cup. Add enough milk to equal 1 cup. Stir and allow to sit for about 5 minutes, until the milk begins to curdle. Stir before using in a recipe. For this recipe I did 1 tablespoon of white vinegar and enough milk to make 1/3 of a cup.
Recipe Swap - Mint Chocolate Chip Cookies
Want to see what other Secret Recipe Club recipes were made during the swap? Here is the link to the Secret Recipe Club Recipe Swap Part 2 Roundup
The SRC-style Recipe Swap was so popular last time that I decided to make it a regular theme. This go-round I ended up with my good friend Jaida's blog, Sweet Beginnings. Jaida actually reached out to me because of the recipe swaps, which she had seen on my blog. She wanted to start a blog of her own and we found ourselves emailing and chatting on a regular basis. That's one of the things I love about the blogging community - I've met so many great people through my blog. One day I'll make it out to Texas or she'll make it out to PA and we'll actually get to meet in person. 
As much as I love being able to choose whatever recipe I want for the SRC-style swap, sometimes having to make that decision can be difficult. Jaida's blog is full of delicious recipes I want to try and narrowing it down was hard. As you'll see in Tuesday's post, I couldn't pick just one thing so I opted to make one savory and one sweet recipe. I recently won a McCormick giveaway on Chocolate Moosey, so I decided to finally bake these Mint Chocolate Chip Cookies I've been drooling over for months. Like Jaida, mint chocolate chip is my favorite ice cream flavor. I've always loved it and 8 out of 10 times that's the flavor I'll pick if we're having ice cream. I couldn't wait to try it in cookie form. 
Now we all know I don't bake, so this was a big deal for me. And I decided to bake these on a Wednesday night, which just goes to show how easy they are to make. I started at 7:50pm and had all the cookies baked and cooling by 8:35pm. That's impressive for me. I didn't even need to bust out the KitchenAid stand mixer; I just used my trusty hand mixer and it did a great job. What impressed me the most about this recipe was that the cookies didn't spread in the oven. That's always my biggest complaint when I make cookies. I like a moist, chewy, puffy cookie, not a crispy, thin cookie. These were perfect.  Since the recipe makes approximately 36 cookies I baked them in batches. And as you can see, my cookies aren't green. Sadly, I don't own food coloring (remember, I don't normally bake). I think the green color is fun and definitely alerts folks to the minty flavor, but it isn't necessary for a tasty cookie. I tried one after they'd been cooling for a few minutes and I had to physically restrain myself from eating another. This is why I don't bake, people. The results are just too tempting.
Thanks for a wonderful recipe, Jaida!
Mint Chocolate Chip Cookies
Sweet Beginnings
1 cup sugar
1 cup butter
1 teaspoon vanilla
1/4 teaspoon mint extract
8-10 drops green food coloring
1 egg
2 1/3 cups flour
1 teaspoon baking powder
1 bag (12 oz) semi-sweet chocolate chips
Preheat oven to 350 degrees.
Beat together butter and sugar on low speed (using a hand or stand mixer) until fluffy. Stir in vanilla, food coloring, and egg; mix well. Sift together flour and baking powder in a small bowl and slowly add to the sugar mixture, combining well after each addition. Once combined, stir in chocolate chips using a wooden spoon.
Drop heaping tablespoons onto a foil-lined baking sheet about 2 inches apart. Bake 7-9 minutes until just set. Remove to cooling rack.
Makes approximately 36 cookies
Secret Recipe Club - Cookies and Cream Brownies
It's that time again, time for another Secret Recipe Club reveal. We had January off so when I feel like it's been a very long time since I did one of these posts I'm actually right.
This month I got the blog Everyday Sisters. It's written by four sisters with 10 kids between them. A lot of the recipes on their blog have been passed down from various family members or are from magazines and cookbooks their mom used. It was fun to look through the blog and get a glimpse into their lives through the food they cook. 
When it came time to choose a recipe, though, I was stumped. Thankfully we got our blog assignment in early January and my post wasn't due until the end of February so I had plenty of time to see what the ladies came up with over the next month. We ended up being invited to a Super Bowl party and I was tasked with dessert, which if you've read my blog before you know is not my forte. I decided to see what the sisters had on their blog in the way of dessert and low and behold the first recipe to pop up that day was for these Cookies and Cream Brownies. Perfect!
Since I'm not much of a baker the fact that this recipe has two ingredients (if you don't count what you need to make the brownies) is what sold me. I also knew they'd be a big hit at the party. How can you go wrong with Double-Stuf Oreos and brownies? You can't. Just look at the inside of the brownie:
These took me all of 30 minutes to make, including the 15 minutes for baking. The most time-consuming part is dipping the cookies in the brownie batter. Here they are ready to be baked:
I was right about them being a hit. All the women at the party asked for the recipe. I felt like I was cheating telling them it was just brownie mix and Oreos, but they loved not only the taste but how easy they were to make. I sent the rest of the leftovers to work with SP. We got suckered into buying Girl Scout cookies and I don't need even more sweets around the house.
The only change I made was to the cooking time. Since the brownies have to cool in the tin I suggest under-baking them slightly. The full 15 minutes plus cooling time resulted in a much harder brownie then I typically like. I adjusted the cooking time to 12 minutes to compensate. I think these would be amazing with whipped cream or vanilla ice cream.
Cookies and Cream Brownies
Slightly Modified From Everyday Sisters
1 box family size brownie mix
1 package of Double-Stuf Oreos
Preheat oven to 350 degrees F. Generously grease two muffin tins with cooking spray.
Make brownie mix per package directions. Dip 24 Oreos into the brownie batter until coated completely. Place one in each greased muffin cup. If you have leftover batter, divide it evenly among the muffin cups.
Crush the remaining 6 Oreos in a plastic food storage bag using a rolling pin. Sprinkle crushed Oreos on top of each brownie-battered Oreo. Bake for 12 minutes. Let cool completely before removing from tins.
Cupcakes with Nutella Frosting
My friend Melissa posted these Banana Cupcakes with Nutella Frosting recently and it seemed like the universe was trying to tell me something when SP found our missing jar of Nutella the same night. My aunt was in town this past weekend and had offered to make dinner, so I thought I'd bring these cupcakes over for dessert. 
I asked SP and my mom and they both agreed that regular cupcakes with Nutella frosting would be more to their liking, so I just whipped up a batch of cupcakes using a boxed mix I had on hand. The frosting couldn't have been easier and the slice of banana on top was a nice touch. Just a word of warning, though - if you use the sliced banana only slice and top as many cupcakes as you plan to eat. The banana got slimy and ruined the last few cupcakes we had saved.
Nutella Frosting
I Was Born to Cook
1/2 cup Nutella
1 1/2 cups confectioners' sugar
5 tablespoons heavy cream
Mix all ingredients together until fluffy. Add a bit more cream if necessary. Frost cupcakes once they are completely cool. Garnish with a banana slice, if desired.
Cake Batter Cookies
We all know I don't really bake, so when our friends invited us to their house for dinner and asked that I bring dessert I figured I'd end up buying something at a bakery. Then I remembered seeing these Cake Batter Cookies on Stephanie's Top Ten Recipes of 2011 and thought it would be a nice way to use up some cake mix I had in the pantry and get Baby Girl in the kitchen with me. 
These could not have been easier to make since all you are really doing is dumping the cake mix in a bowl and adding baking powder, eggs, oil and chocolate chips. Like Stephanie says, I bet these would be fun using different kinds of cake mix and different add-ins like nuts or M&Ms, raisins or even dried fruit. The possibilities are endless and because the dough is so simple the sky's the limit.
Baby Girl had a blast helping me (she especially loves stirring and dumping things into bowls). She even had her own spoon to take the dough from the bowl and put it on the cookie sheets. I love getting her into the kitchen and she loves helping so it's a win-win. My only complaint is that my cookies spread in the oven. Next time I'll chill the dough a bit before putting it on the cookie sheets. I've modified the directions below.
Cake Batter Cookies
Slightly Modified from Stephanie Cooks
1 (18.25 oz.) box cake mix
1 teaspoon baking powder
2 eggs
1/2 cup vegetable oil
1 cup semisweet chocolate chips
Preheat oven to 350 degrees F (175 degrees C).
In a medium bowl, stir together the cake mix and baking powder. Add eggs and oil, then mix until well blended. Stir in chocolate chips, or your choice of add-ins. Cover the bowl and chill for 30 minutes. Once chilled, drop by rounded spoonfuls onto cookie sheets.
Bake for 10 minutes in the preheated oven. Allow cookies to cool on baking sheets for 5 minutes before transferring to a wire rack to cool completely.
Makes approximately 30 cookies
Santa Hat Brownies
As soon as I saw my friend Jessy's post for Santa Hat Brownies I knew they needed to be part of our Christmas dinner. I emailed my mom to ask her to make the brownies and bring the rest of the ingredients to our house for dinner so Baby Girl could help her assemble them. 
Watching the two of them assemble the brownies was priceless. Baby Girl loved helping and the resulting brownies were adorable. But man, are they rich! I don't eat dessert that often but I could barely finish one of these. I think the buttercream was very, very sugary and heavy so I, personally, would prefer whipped cream. I don't know how they whipped cream would hold up, but at least it would be lighter. Even so, these are a really cute addition to any Christmas table.
Santa Hat Brownies
Gourmet Day to Day
1 pan of brownies, baked and cooled
20-24 small strawberries
1 batch of buttercream frosting (or a frosting of your choice)
Buttercream Frosting
(you will have some extra buttercream left with this recipe)
3 cups confectioners’ sugar
1 cup butter (softened but not melted)
1 teaspoon vanilla extract
1 to 2 tablespoons whipping cream
In a standing mixer fitted with a whisk, mix together sugar and butter. Mix on low-speed until well blended and then increase speed to medium and beat for another 3 minutes.
Add vanilla and cream and continue to beat on medium speed for 1 minute more, adding more cream if needed for spreading consistency.
To Assemble Brownies:
Using a small round cookie cutter or a small drinking glass, cut out brownies. Clean and remove stems from strawberries, cut the stems off flat so it will sit flat on the brownie. Place strawberries point side up on the center of each brownie circle.
Using a piping bag (or zip-top bag with the corner snipped to create a piping bag in a pinch) Pipe the frosting around the strawberry for the white rim of Santa’s hat and top each strawberry point with a small drop of frosting.
Note for storage: If you plan on refrigerating these cuties, make sure you chill them uncovered first. This will allow the buttercream to harden so you don’t you lose your cute Santa hat topper to plastic wrap!
Recipe Swap Roundup - Holiday Cookies/Treats
Tis the season for baking. You all know by now that I'm not much of a baker, but I couldn't resist making Holiday Cookies/Treats one of the themes for the recipe swap. I know most of the time people make the same recipes every year, usually by request from hungry friends, family or coworkers, but every once in awhile it's nice to branch out.
Jaida loves mint and chocolate so she was thrilled to get Mint Oreo Fudge:
Melissa celebrated her blog's first birthday with these Mint Chocolate Chip Cookies:
Jenna was hoping her White Chocolate Dipped Spice Cookies would bring back memories of her grandpa's favorite cookie, but they were a little too busy in the flavor department for her tastes:
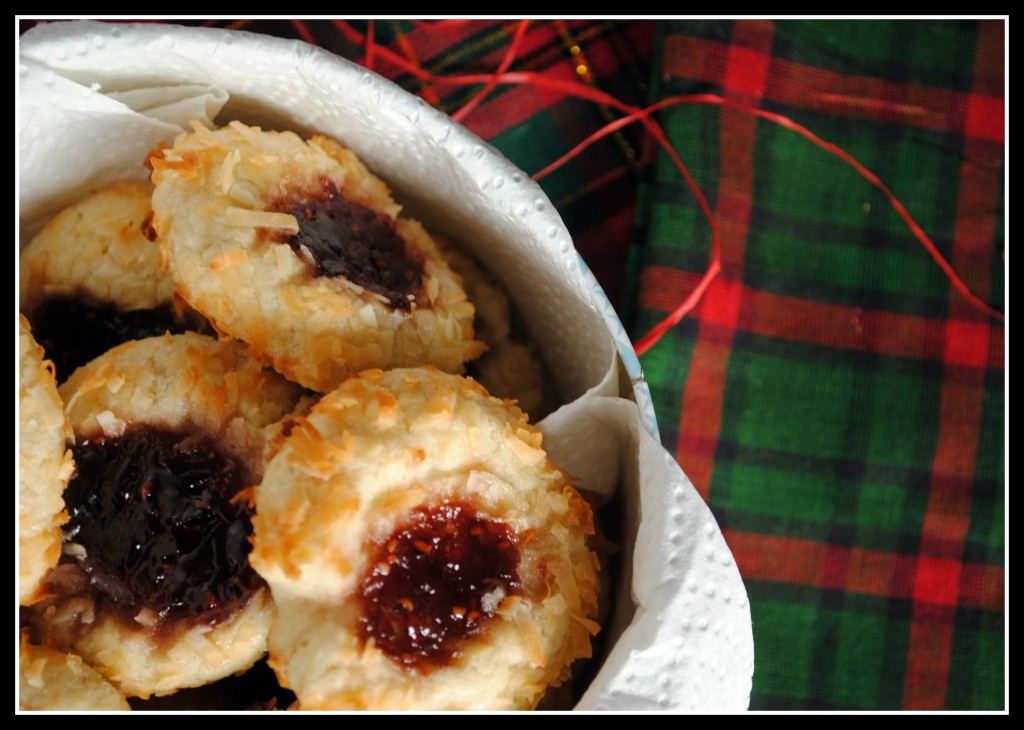
Nicole had my Jam Thumbprint Cookies, which are my all-time favorite holiday cookie. Thankfully, she agreed:
Lishie loves baking and her recipe for Chewy Ginger Molasses Cookies really hit the spot:
Jey's Caramel Chex Party Mix was the perfect mix of sweet, tasty and easy:
Ashley isn't a big fan of fudge but her sister loved the pretty colors in the Candy Cane Fudge:
Cathy's recipe was aptly named Christmas Crack (aka Saltine Toffee Bark):
The Cookaholic Wife is a big fan of chocolate and peanut butter so she loved her recipe for Peanut Butter Cups, even if she had to use a regular size muffin tin to make them:
Coleen had some minor issues with her Oatmeal Cookies, but they were still light, chewy and delicious:
Allison, a newcomer to the swaps, enjoyed her Chocolate Gingerbread Cookies, a spicy treat (especially for breakfast):
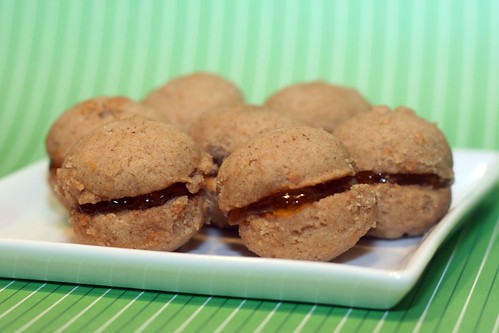
Katie made adorable Spoon Cookies filled with apricot preserves:
After making tons of cookies this holiday season Nicole was happy to do something different with Chocolate Dipped Pretzels:
I had a small issue with my Black Bottoms, so this is my pinch baker's photo:
Diana, a newcomer to the swap, doesn't have a blog but she did take pictures and write a review of her recipe for Pumpkin Seed Cranberry Biscotti:
I adapted this recipe from its original form – subbing out the cranberries and pumpkin seeds. Neither one of these items are liked in my household and with the base recipe the changes were easy to make. I have to say I was a little bit skeptical about making biscotti since I’d never made it before. This was a very easy recipe and I have to say with my minor substitutions this recipe came out delicious. My husband (who never really liked biscotti) likes these.
Pecan Chocolate Chip Biscotti Recipe
Adapted from Delish!
3/4 cup sugar
2 eggs
1/4 cup canola oil
1-1/2 teaspoons pure vanilla extract
1/2 teaspoon almond extract
1-3/4 cups all-purpose flour
1 teaspoon baking powder
1/2 teaspoon salt
1 cup chopped pecans
1/2 cup chocolate chips
In a small bowl, beat the sugar, eggs, oil and extracts. Combine the flour, baking powder and salt; gradually add to sugar mixture and mix well. Stir in pecans and chocolate chips (dough will be sticky).
With lightly floured hands, shape each portion into a 12-in. x 2-in. rectangle. Bake at 350° for 25-30 minutes or until golden brown.
Carefully remove to wire racks; cool for 10 minutes. Transfer to a cutting board; cut diagonally with a serrated knife into 3/4-in. slices. Place cut side down on baking sheets.
Bake for 5 minutes or until firm. Turn and bake 5-10 minutes longer or until lightly browned. Remove to wire racks to cool. Store in an airtight container. Yield: 2-1/2 dozen.


Recipe Swap - Black Bottoms
Want to see what other Holiday Cookies/Treats recipes were made during the swap? Here is the link to the Holiday Cookie/Treats Recipe Swap Roundup
The holiday season is in full swing and for many people that means doing a lot of baking. Many of my favorite food blogs have been posting recipes for cookies and other treats to make for holiday parties and gifts. I thought, what better theme for the swap then Holiday Cookies/Treats!
Since I'm the organizer for these swaps I tend to hold myself to a higher standard. I like to make my recipe early and allow myself plenty of time for any mishaps. I ask the participants to be conscientious so I need to do the same. Imagine my dismay when I realized the swap was due in a week and I had completely forgotten about it. There it was, late Sunday afternoon and I found myself with about an hour to get these Black Bottoms from Katie together. Thankfully I had 4 ounces of cream cheese left in the fridge from another recipe, but I was out of chocolate chips. With no time to run to the store and no chance to make them during the busy workweek, I forged ahead. Not being a baker, I didn't realize how vital the chocolate chips were going to be. I figured they were just an added bonus, but unfortunately my Black Bottoms weren't very good without them. Here is my photo of the Black Bottoms:
My friend Jaida has always said she'd be willing to fill in if someone had an issue with the swaps, so I asked for her help as a pinch baker. Being the great friend and baker that she is, she rose to the occasion. Here is her photo of the Black Bottoms:
And her comments about the little treats: "When the opportunity arose to try out these blackbottoms, I was excited because I love chocolate and I love cream cheese. Not to mention I love miniature-sized desserts! The cake part itself is not too sweet, but the cream cheese topping with the chocolate chips makes it just right!! And, a few of the chocolate chips sneak their way into the chocolate part and when you bite into one, there is a surprise center of melty chocolate – delish!! I refrigerated them overnight due to the cream cheese element, and brought them to work the following morning. I had barely made it through the door when a co-worker accosted me for the day’s baked goods and after one bite she declared, “Oh my God, these are delicious!” So, the verdict is in – these little treats are a winner!"
Katie, I promise to make these again once I pick up some chocolate chips. And a big thanks to Jaida for stepping in and helping a girl out. You rock.
Black Bottoms
So Tasty, So Yummy
Makes 48 miniature cupcakes/24 regular cupcakes
1 1/2 cups flour
1 cup sugar
1/4 cup cocoa
1 tablespoon white vinegar
1/2 teaspoon salt
1/2 cup oil
1 cup water
1 teaspoon vanilla
8 ounces cream cheese
1 egg
1/4 teaspoon salt
1/2 cup sugar
1 cup chocolate chips
Preheat oven to 350.
Mix first eight ingredients (through vanilla) together and set aside.
In a separate bowl, beat the cream cheese, egg, salt and sugar together. Stir the chocolate chips into the cream cheese mixture.
Line two muffin pans with paper liners. Divide chocolate batter evenly. Top evenly with the cream cheese mixture.
Bake for 15 to 20 minutes, until set.
Recipe Swap Roundup - Thanksgiving Desserts
With Thanksgiving falling right in the middle of the two weeks participants have to make their recipe for the swap I thought a theme of Thanksgiving Desserts would be perfect. Pumpkin pie might be the traditional sweet treat, but judging from these recipes below it certainly isn't the end-all, be-all of Thanksgiving desserts. Check out the recipes below and see if one catches your eye for next year's feast.
Melissa was worried her recipe for Pumpkin Roulade with Buttercream would be difficult to make, but it was actually easy and delicious:
Patrizia, a newcomer to the swaps, really enjoyed her recipe for Pumpkin Whoopie Pies, despite her initial hesitancy about the "fall" flavors: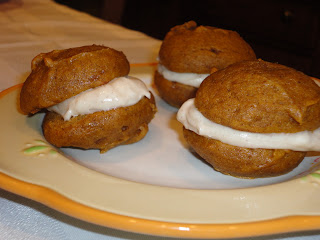
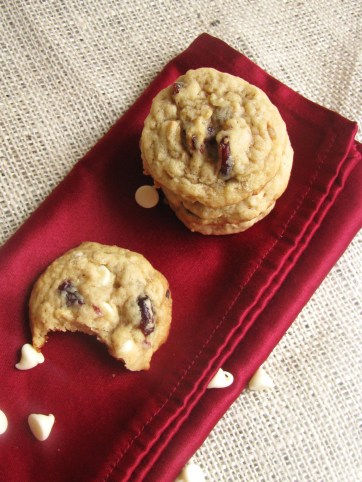
Chrissy loves anything with white chocolate in it, so her Cranberry White Chocolate Oatmeal Cookies were a big hit:
Ashley really stepped out of her comfort zone with Triple Chocolate Cheesecake, which was a big hit with her husband and family:
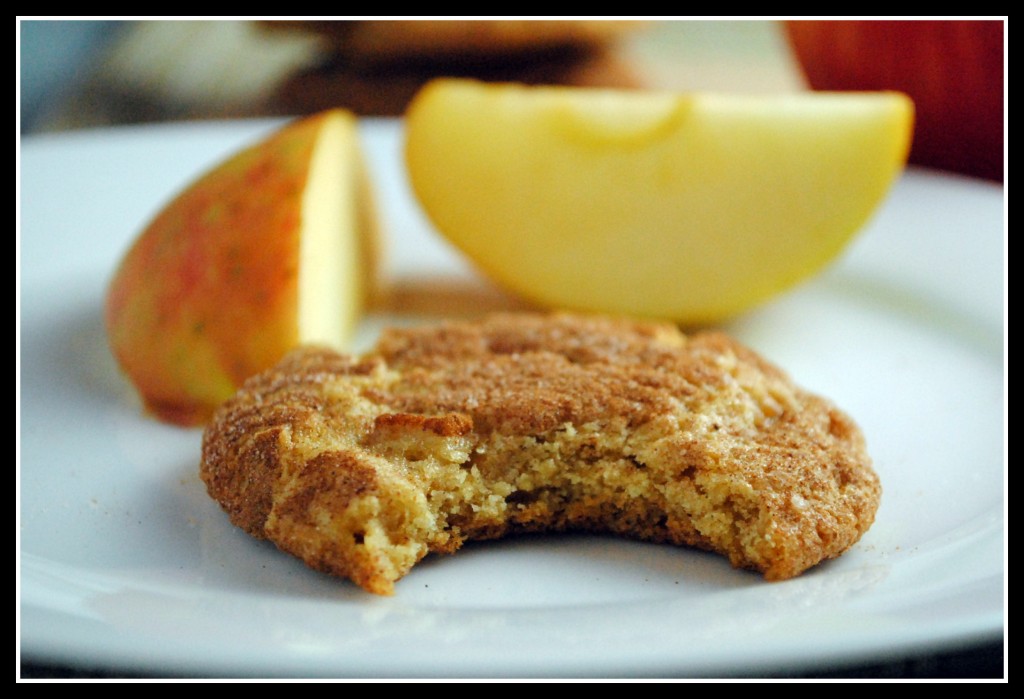
Nicole's Caramel Appledoodles were so good they solicited a marriage proposal:
My stepdad went back for seconds of these Pumpkin Cheesecake Cupcakes, which is a testament to how good they were:
Jaida was happy to break away from the pumpkin craze she's been on with Nantucket Cranberry Pie:
Ellie's Pumpkin Chocolate-Chip Squares were perfectly moist and utterly delicious:
Jenna modified my recipe for Butterscotch Pumpkin Cupcakes and they were a big hit:
Lishie had a lighter holiday dessert, Meringue Nests, that were melt-in-your-mouth delicious:
The Cookaholic Wife doesn't have good luck with layer cakes, but that didn't stop her from enjoying her Vermont Spice Cake with Cream Cheese Frosting, with two layers instead of four:
Coleen wasn't able to make her recipe for No Bake Pumpkin Cheesecake for Thanksgiving as planned because her son decided to arrive two weeks early (congrats!!):
Nicole loves baking bar treats so she loved her recipe for Pumpkin S'mores Bars:
Christine's Cranberry White Chocolate Almond Cookies were devoured by her hungry relatives:
Jey's Chocolate Hazelnut Tart was a huge hit at Thanksgiving dinner:


Recipe Swap: Pumpkin Cheesecake Cupcakes
Want to see what other Thanksgiving Dessert recipes were made during the swap? Here is the link to the Thanksgiving Dessert Recipe Swap Roundup
In honor of Thanksgiving I thought a Thanksgiving Dessert recipe swap would be a great way for people to bring something new to the holiday table. This was the first year that I hosted Thanksgiving dinner so I was happy to have one part of the meal decided for me, especially when I ended up receiving Pumpkin Cheesecake Cupcakes from The Cookaholic Wife. I love cheesecake and I love pumpkin, so combining the two was perfect.
In my family dessert is usually secondary to the turkey with all the trimmings. In the past my mom would make a pumpkin pie, but by the time we got to dessert everyone was so stuffed we'd just have a small taste. Since these cupcakes are individual portions it worked out well.
We all know I'm not a baker, but these were very easy to assemble (I did it the night before because they had to chill for at least 4 hours). The recipe says it will make 24 cupcakes, but I ended up with batter leftover, enough for probably another 2-3 cupcakes. And I even thought I had overfilled the tins, so this is fair warning that you might get more than 24 cupcakes out of this recipe.
You know something is a hit when my stepdad goes back for seconds. He rarely eats dessert but he had two of these cupcakes and took more home with the rest of the leftovers. Everyone else thought they were delicious and really liked the pumpkin swirl in the center instead of the entire cheesecake being pumpkin-flavored. I thought the filling was a tad too sweet so I cut down the sugar in the recipe below. I will definitely make these again. Thanks, Cookaholic Wife!
Pumpkin Cheesecake Cupcakes
Very Slightly Modified from The Cookaholic Wife
Pumpkin Mixture:
1 15 oz. can pumpkin
3 teaspoon sour cream
1/3 cup sugar
Filling:
2 8 oz. bricks cream cheese, softened
1 cup sugar
4 eggs, at room temperature
1 teaspoon vanilla extract
1/8 teaspoon salt
Crust:
1 package graham crackers, plus 2 crackers
4 tablespoons butter
2 teaspoons sugar
Preheat the oven to 325. Line cupcake pans with liners. You might end up with more than enough batter for 24 cupcakes, so if you have an extra cupcake tin be prepared to use it.
Use a food processor to grind up the graham crackers. Melt the butter. Add the sugar and butter to the graham cracker crumbs. Stir to combine. Put 1 tablespoon of the graham cracker mixture into each cupcake liner. Use a glass to press down. Bake for 5 minutes and then transfer to a cooling rack.
Using the paddle attachment in a stand mixer, beat the cream cheese on medium speed until fluffy. Add the sugar and mix until smooth. Add the vanilla and the salt. Next, add the eggs one at a time making sure that they are fully combined before adding the next one. Scoop approximately 1 1/2 tablespoons of the cream cheese mixture into each of the cupcake liners.
In a medium bowl, combine the pumpkin, sugar and sour cream. Stir until well combined. Scoop approximately 1 tsp. of the pumpkin mixture into the center of the cheesecake. Swirl with a toothpick.
Bake for 25 minutes, rotating the pans half way through. Let the cupcakes cool to room temperature on cooling racks, then transfer to the refrigerator and chill for at least 4 hours.
