CHARLIE BROWN TREES!

HI EVERYONE,

I'm still here but been very busy with orders from my wonderful customers.

I had planned on getting my decorating done this week but it didn't happen - maybe this coming week if all goes the way I plan.

I did close all Christmas orders on my website so I don't get backlogged as Christmas gets closer and this is why you haven't seen me on your blogs commenting and looking at all your beautiful Christmas decorating and family happenings....I know I'm missing out on so much but rest assured I will visit you soon!

I did need to get out of the house yesterday and while out we went to a little local shop and I bought a 6 ft. Charlie Brown tree and today Doug tried to get it shaped up...but he couldn't understand why he had to 'shape it' - it looks like a tornado hit it so no matter what he did to it he said it didn't look much different - he did good though. Now I just need to adjust the branches where I want them.

I have a 3 ft. and 4 ft. tree like it and they fast became my favorite decoration for the season.
Anyway I wanted a larger one for my Mercury ornaments being the collection is getting bigger.
Hopefully after it's decorated it will look better.
One thing I'm not sure of is whether to put lights on t or not...any ideas on this?

So here's the 6 ft - still needing much work and I'm really not sure just where or which room it will go in - Doug says it is going to be our main tree...he's not bringing the other larger one up as long as we have this one. So I guess I had better work some magic here!
And YES IT LOOKS CRAZY and NO...IT'S NOT SHAPED THE WAY IT WILL LOOK IN THE END!


 My 4 ft. tree that held my Mercury ornaments last year...not sure what I will put on it this year.

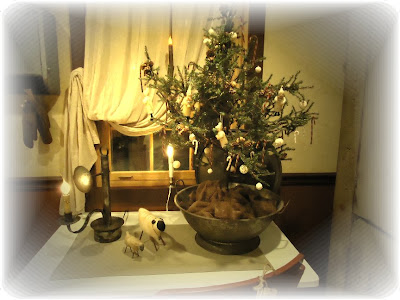
And my sweet little 3 ft. kitchen tree in the Tin Dough Riser...my original Charlie Brown tree and my favorite.


So this my dear blogging friends is why I'm MIA and will be yet for another week at least.
Blessings,
Karen

  • Digg
  • Del.icio.us
  • StumbleUpon
  • Reddit
  • RSS

Simple Stockings

stockings1

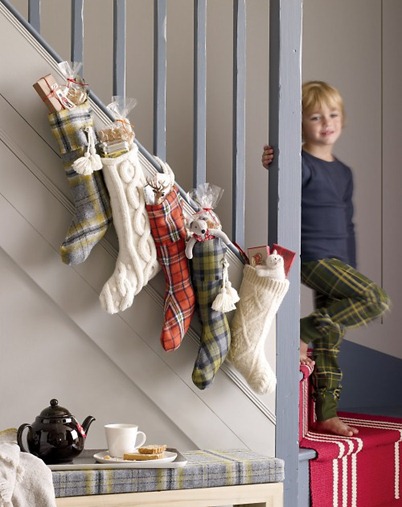
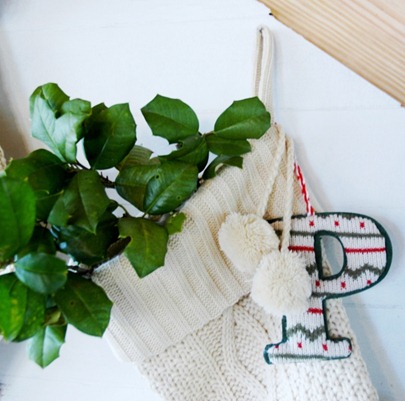
How thrifty is this?  Using old sweaters and flannel shirts to make stockings.  When I originally saw this image on Pinterest, I was instantly sold on the recycled, hand made holiday aesthetic.  But being the purger that I am, I didn’t have any old sweaters or flannel shirts sitting around in storage.  Several trips to Goodwill later, I was able to successfully stock up on a pile of cable knit.  The problem?  It’s still in a pile.  I never got around to the project.  Sigh. 

stockings8

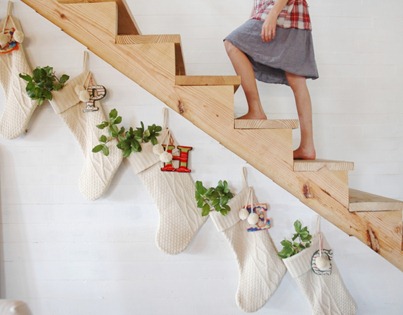
But thanks to my friendly neighborhood Target, I got off the hook.   So much for the “recycled” aspect.  But it still looks “homemade holiday”, especially  mixed with our unfinished staircase.  ;) 

stockings3

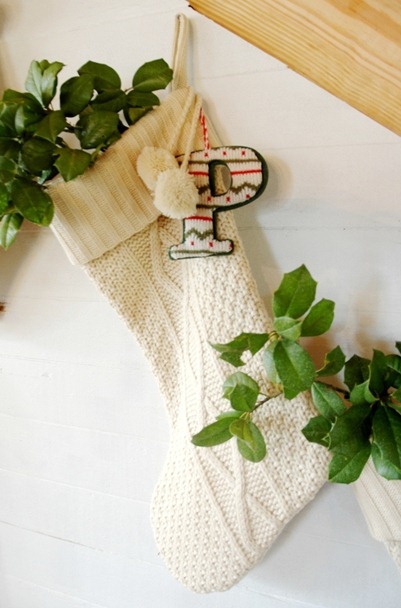
The stockings were around $12 a piece.  The monograms add a personal touch, and each letter is on sale for $2.50 in the ornament section… thrifty! 

stockings6

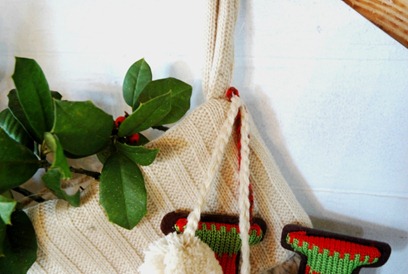
I simply tied the pompom strings around the ornament string.

stockings4

If you ever get around to the recycled stocking project, I have some old sweaters you can use.  :)  

  • Digg
  • Del.icio.us
  • StumbleUpon
  • Reddit
  • RSS

A model hotel

If this morning's hotel wasn't quite your thing, how about this one? This is a snap shot from The Exchange hotel in Amsterdam. where each room is designed by a student from the Amsterdam Fashion Institute. Talk about staying in style!


Picture: The Exchange Hotel via April & May

  • Digg
  • Del.icio.us
  • StumbleUpon
  • Reddit
  • RSS

Quick Barbecue Pork Chops

I recently confessed to having a tough time with pork chops. I asked the ladies on my cooking board for recommendations and this Quick Barbecue Pork Chops was one that immediately caught my eye. What could be easier than browning chops and then letting them simmer on the stove with BBQ sauce and a little brown sugar?


I think this recipe hinges on the sauce you use. When it comes to BBQ sauce everyone has their own preference, with tangy vs. sweet being the biggest divider. We are tangy fans and after a lot (and I do mean a lot. I think we tried every brand our store sells) of searching we found that Dinosaur is our favorite. Homemade sauce would obviously be great as well.

I served my chops with Buttermilk Mac and Cheese and green beans, but if you're making these in the summer I suggest potato salad and fresh corn on the cob. We both enjoyed the flavor of the chops and I enjoyed not having to work very hard to make them. I'll definitely be using this method again.

Quick Barbecue Pork Chops
Get Off Your Butt and Bake

2 tablespoons canola oil
4 boneless pork chops
1 1/2 cups of your favorite barbecue sauce
Salt and pepper
1 tablespoon brown sugar

Heat oil in a skillet over medium-high heat. Season pork chops with salt and pepper on both side, then add to skillet. Let brown, about 5 minutes per side, turning only once. Add BBQ sauce, bring to a simmer, then turn heat down to maintain a light simmer. Sprinkle in brown sugar and 3 tablespoons of water. Mix the sauce, water and brown sugar together by moving the pork chops around a bit.

Let simmer slowly for about 20 minutes or until chops are tender.

  • Digg
  • Del.icio.us
  • StumbleUpon
  • Reddit
  • RSS

Surround yourself with beautiful pieces

Morning and happy 'lilla lördag' (little saturday) as it's known in Sweden as everyone should go out and have a mid-week drink. Not for me unfortunately, so instead I am mentally transporting myself to one of three apartment suites in the Azzedeine Alaia hotel in Paris....


Photographs: Persona Production via SF Girl By Bay
The rooms, designed by Yatzer, have carefully selected the furniture and lighting and kept everything else minimal so that you can enjoy its beauty and your stay. Oh and I would Yatzer, I would. It also supposedly leaves room for the guests own creativity. What do you think? Something for the weekend? Or to stark for your tastes? Read more about it here.  

  • Digg
  • Del.icio.us
  • StumbleUpon
  • Reddit
  • RSS

Wonderful Copenhagen

I am in beautiful Copenhagen this afternoon looking for a cool home for a press shoot. I love the Danish capital, it's so relaxed with a lovely bohemian feel. I might just stay all afternoon....


Picture and poem: an exquisite waste of time

  • Digg
  • Del.icio.us
  • StumbleUpon
  • Reddit
  • RSS

Buttermilk Mac and Cheese

If you've been reading this blog for a long time you might remember my quest to find the perfect mac and cheese recipe. This was years ago and I was on the hunt for a recipe that reminded me of the mac and cheese they served at my college. It was so creamy and cheesy that I would stalk the online menu to see when it would be making an appearance in the dining hall. After many failed attempts to recreate it I finally found my perfect mac and cheese. I use this recipe 9 out of 10 times I make mac and cheese. But every once in awhile I like to try something new, just for variety. Enter this recipe for Buttermilk Mac and Cheese from Cassie.


I've never made a mac and cheese with eggs before, so right off the bat I was pretty skeptical. The preparation reminded me of making a strata or make-ahead breakfast casserole and the end result had a similar texture, with a consistency like cottage cheese instead of being smooth and creamy. SP was initially skeptical as well but went back for seconds, as did I. While it certainly tasted good and couldn't have been easier to make, I think I'll stick with my tried-and-true version. I just love that smooth, creamy, cheesy sauce.

Buttermilk Macaroni and Cheese
Cassie Craves

6 eggs
2 cups shredded sharp cheddar cheese
1 cup shredded Colby cheese
2 cups buttermilk
1/2 cup milk
1/2 cup butter, melted
1 teaspoon salt
1/4 to 1/2 teaspoon pepper
8 ounces elbow macaroni, cooked according to package directions and drained

Preheat oven to 350 degrees.

In a large bowl, beat the eggs. Stir in the cheese, buttermilk, butter, salt and pepper. Add macaroni; toss to coat.

Pour into a greased 13 x 9-inch baking dish. Bake, uncovered, for 45 to 50 minutes or until a knife inserted near the middle comes out clean.

  • Digg
  • Del.icio.us
  • StumbleUpon
  • Reddit
  • RSS

Haul Out The Holly: Christmas Tree Twig Art

Haul Out the Holly,Gwenny Penny,Christmas tutorials

I'm so excited to be a part of the Haul Out the Holly Event again! I had a great time making my felt poinsettias for last year's event!

This year, my project is going to be just as easy and thrifty.

I'm going to show you how to make Christmas Tree Twig Art


I first started with 3 pieces of scrap beadboard I had on hand. Now you can use anything you have available at home. 1x3 pine pieces would work great as well, like I did HERE.

I cut them equal length:16.5 inches
You can use any desired length of your choice


I then took 2 pieces of lathe wood to secure the 3 pieces of wood. I used Gorilla Glue and then nailed them in place. If you have a nail gun, then that is a nice time saver! I love mine! Don't know what I would do without it!


I wanted to create a simple frame around the edge of my beadboard for a more finished look so I cut up a 1/2 inch x 1 inch trim piece in 4 pieces. Mine were approx. 10.5 inches (2) and 15 inches (2) long.
I painted the beadboard an off-white color and then painted the trim pieces a dark red.


While your wood pieces are drying, go out in the yard and start searching for some twigs for your art piece. This is a great opportunity to get your kids involved.


After the paint was dry. I sanded down the edges of the painted wood pieces and added a little Early American MinWax Stain to give them a worn look that I love.

After they were dry, then I glued down the 4 trim pieces with Gorilla glue and a nail gun around the perimeter of the the beadboard. It gives it a nice finished look.


Now the twig tree is so easy. You just start breaking up your collected twigs. I started from the bottom with the longest piece and worked my way up...getting shorter and shorter, until I reached the top. I used 3 small twigs for the trunk. I simply used a hot glue gun to secure the pieces on the beadboard.


For the star, I used skinny twigs all broken in 5 even lengths. I made a star figure and secured the ends with hot glue. I wanted to add a little more interest to the star so I wrapped thin twin around the points and glued them to secure them. They are more for looks than function. :)


The power of scrap wood, nature and a glue gun to create your own Christmas Art!


Thanks so much for visiting today. And a big thanks to Gwen from Gwenny Penny for having me join in on the the Haul Out The Holly Festivities!

Now the event continues for 3 weeks! There will be a featured blogger each day showing off a fun Christmas craft tutorial that you can make, too!


Linking up HERE
Best DIY Projects of November-Beneath My Heart
Christmas Linky Party at Someday Crafts

  • Digg
  • Del.icio.us
  • StumbleUpon
  • Reddit
  • RSS

A Swedish apartment in monochrome

A little morning monochrome to share with you today! This Stockholm nugget of an apartment (I say 'nugget' as it's 45 metres square!) is light, white and completely clutter-free. There is no way I could have so few things around me, no matter how hard I tried, but it does look rather lovely....


All pictures: Alvhem via 79 ideas
PS I especially love the calendar, which you could make at home perhaps, using computer print outs stuck to the wall with oh-so-now masking tape. Or any other tips? 
Kram!

  • Digg
  • Del.icio.us
  • StumbleUpon
  • Reddit
  • RSS

Terrific Under Ten Tuesday #40

WELCOME TO TERRIFIC UNDER TEN TUESDAY!

I can't believe it's my 40th linky party! Time flies when you're having thrifty fun! Thanks to all who link up each week! And welcome to all newbies! I enjoy all of your fun projects and thrift finds for $10 or less! Your talent and creativeness never gets old!

Here are a few projects I would like to feature from last week's party:

English Breakfast Cardstock from c.w.frosting
Grab some tea and some notecards and create a beautiful gift for a friend.


Easy Candle Upcycle from Happy-Go-Lucky
We all have half used candles around...why not create some new ones with them. I love the layers!


Nature Inspired Christmas Wreath from Shabby Love
A beautiful wreath to create to have up all winter long.


The Welcome Window from Artsy VaVa
Create a welcoming piece using an old window! So pretty.

If you were featured today, please grab a button! Thanks!


Now it's time to link up to this week's Terrific Under Ten!

Here are the rules:
1. Your project must be made or bought for $10 or less. Crafts, Makeovers, Thrift Finds, Recipes, Kids Projects...
2. Please do not link up Online Shops or Giveaways.
3. You can link up multiple projects.
4. Link to the specific post and not to the main page of your blog.
5. Add the Terrific Under Ten Tuesdays button to your post, side bar, or linky party list.
6. Visit at least one other project and leave a comment. We all love comments!
Then I'll feature some favorites on the next Terrific Under Ten Tuesday.
*By linking up, you give me the permission to use your photo(s) from your post.

  • Digg
  • Del.icio.us
  • StumbleUpon
  • Reddit
  • RSS

Allure

floor4

I
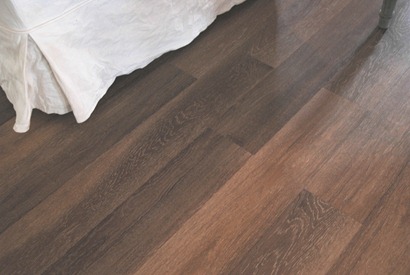
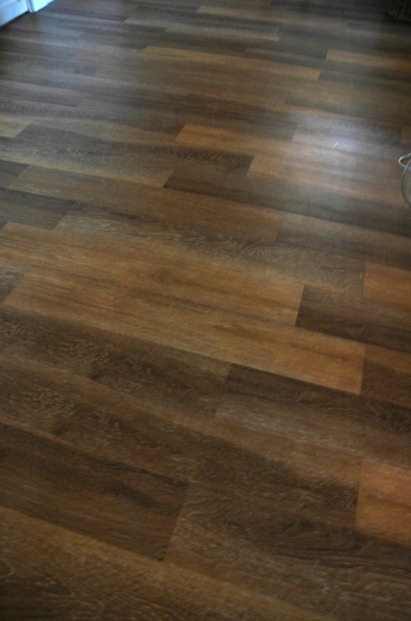
sn’t it pretty?  I love it.  We would have preferred to lay true wood  flooring, but the kind we wanted was way over our budget (of course).  So, it came down to choosing between cheap hardwoods, laminate or Allure vinyl flooring.  I know, I know, vinyl sounds absolutely horrid right?  But have you seen the Trafficmaster Allure selection at Home Depot?  So beautiful! 

floor6

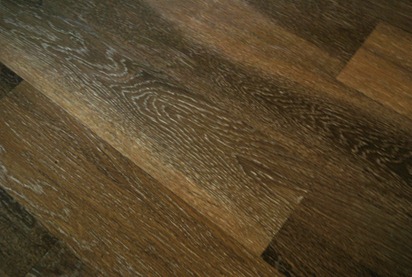
I chose the color, “Limed Oak”.  I like the variation of warm tones throughout it, and I especially love how it looks pickled in spots.  The fact that it doesn’t go clickity-clack when you walk on it is also a plus (like laminate would).  With it being vinyl, clean up is a breeze. 

floor5

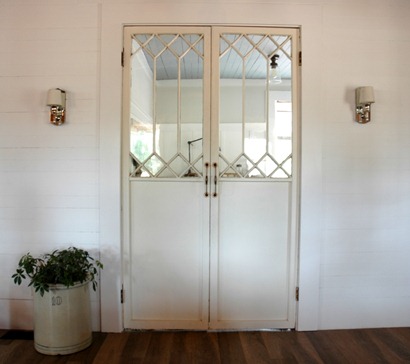
Not only is the floor down, but I finally finished one wall in our foyer.  It’s so wonderful being able to look at this one spot in our house and see it complete.  Look to the left or the right or above… and not so much.  All in time.

doors2

We decided to keep the plank walls and caulk in between them.  Thanks for your votes on that one!  It helped tremendously.  The planks are painted “Clean White” (Valspar) flat, and semi-gloss for trim and baseboards.  The doors are painted “Cottage White” (Behr). 

handles

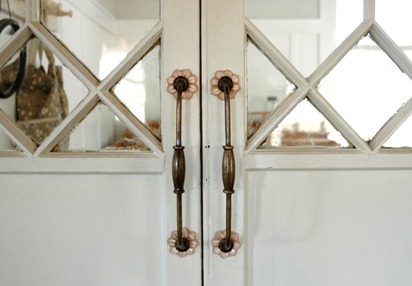
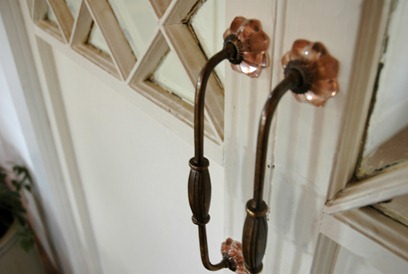
I found the drawer pulls at Anthropologie, but they work just as well for door pulls set vertically. 

handles2

I’m enjoying my new finished spots, however small they might be!

  • Digg
  • Del.icio.us
  • StumbleUpon
  • Reddit
  • RSS

Support Movember!

Hej hej! A hairy reminder that there's only a few days left of the month formerly known as 'November' where cool men (Mo bros) sprout moustaches around the world for 30 days to raise money and awareness for men's health issues such as prostate cancer. Find out more at Movember!

Moustache bedding: Urban Outfitters

  • Digg
  • Del.icio.us
  • StumbleUpon
  • Reddit
  • RSS

Secret Recipe Club: Tuscan Garlic Chicken

For Round Two of the Secret Recipe Club I was assigned Fried Ice and Donut Holes, a blog written by Melissa, who is a teacher by day and cook/baker by night. She is a frequent participant in the recipe swaps I host, so I was very excited to take a closer look at her blog as part of SRC.

It's a huge understatement to say I had a tough time picking a recipe to make. I had written down 20 choices before I got through the last six months of recipes. Melissa and I have similar tastes when it comes to cooking, which made narrowing the choice down even harder. In the end I decided to make a recipe I've been seeing on a few of my favorite blogs lately - Tuscan Garlic Chicken. It has everything I like in a recipe - cream sauce (not healthy, but this one is mostly milk), chicken, spinach and pasta. I couldn't wait to make it.


When I put the plate in front of him, SP said it looked like something you'd get at a restaurant. I really enjoyed this, but we both felt the cream sauce was a little too light. I know we're both spoiled by unhealthy sauces made with heavy cream or even half and half, so next time I'll make this one with a bit more of an even split between milk and half and half for some extra body. I think it needs more garlic because I found myself wanting that flavor to come through a bit more. I think I'd like it more with tomatoes instead of red pepper, just because I'm not a big fan of peppers. Otherwise it was a great dish. I've made my changes in the recipe below.

Tuscan Garlic Chicken
Very Slightly Modified from Fried Ice and Donut Holes

1/2 cup all-purpose flour
1/2 teaspoon salt
1/2 teaspoon pepper
1/2 teaspoon dried basil
1/2 teaspoon dried oregano
1/2 teaspoons dried parsley
1 lb boneless, skinless chicken breasts
3 tablespoons extra virgin olive oil, divided
5-7 cloves garlic, grated
1 red bell pepper, cut into thin strips
1/2 cup low-sodium chicken broth
6 oz fresh spinach
1 1/2 cups half-and-half
4 teaspoons cornstarch
1 cup milk
1/2 cup Parmigiano Reggiano cheese, freshly grated
1 lb spaghetti, fettuccine or linguine

Preheat the oven to 350 F.

In a shallow pie plate or similar dish, combine the flour, salt, pepper, basil and oregano. Dip each chicken piece in the flour mixture until both sides are well coated.

In a large 12-inch nonstick skillet, heat 2 tablespoons of the olive oil over medium heat until the oil is hot and shimmering. Carefully place the chicken breasts in the pan, cooking them for 2-3 minutes on each side, until they are golden and browned but not cooked all the way through. Remove the chicken to a foil-lined, lightly greased baking sheet and bake in the preheated oven for about 15 minutes, until the chicken is cooked through. Set aside and tent with foil until ready to use.

While the chicken is cooking, heat a large pot of water to a boil and add the noodles, cooking until al dente. Also, wipe out the skillet with a couple paper towels and return it to medium heat, adding the remaining 1 tablespoon olive oil. When the oil is hot, add the garlic and bell pepper, sauteing for 2-3 minutes.

Stir in one tablespoon flour and stir constantly while cooking for another minute. Add the chicken broth to the skillet and bring the mixture to a low simmer, whisking constantly, until slightly thickened, about 3-4 minutes. In a small liquid measure, whisk together the cornstarch and cream. Add the spinach, milk and cream mixture to the skillet. Bring the mixture to a simmer and cook, stirring occasionally, until the spinach is wilted and sauce is slightly thickened, about 2-4 minutes. Stir in the Parmesan cheese.

When the pasta has finished cooking, drain and return it to the pot. Toss the pasta with half of the cheese sauce. Place some of the coated pasta on each plate. Top with a breaded chicken breast and spoon some of the sauce over the top of the chicken and pasta. Serve immediately.


  • Digg
  • Del.icio.us
  • StumbleUpon
  • Reddit
  • RSS

Monday DIY: Stag wall hanging

How about this for a Monday project? Fun, cheap and hopefully you'll have a wonderful stag trophy like this one to hang on your wall at the end....for the complete step-by-step 'know-how' click here.

Picture: Instructables via April & May
If you make one make sure you share it with us, we'd love to see it....:)

  • Digg
  • Del.icio.us
  • StumbleUpon
  • Reddit
  • RSS

Photographer's studio in a plough factory

So it's Monday. And hopefully not to manic?! This morning I spied this beautiful studio belonging to creative couple Rob & Jill Brinson, which they've converted from an old plough factory, I had to share it with you as I think it's a wonderful space, so light and airy.


All pictures: Via Design Sponge


I particularly love the brick wall gallery and the office.  I'm not sure I could have my bed in the middle of the room though as I have enough problems with my pillows as it is! I'd love to hear your thoughts. For more pics and the complete interview click here. Back shortly with a fun DIY project for the wall....Oooooo!

  • Digg
  • Del.icio.us
  • StumbleUpon
  • Reddit
  • RSS
Related Posts Plugin for WordPress, Blogger...