I'VE GOT THE BLUES...AND PURPLES...

The garden is struggling a bit these days as we can't buy a drop of rain here in Florida. Color is not abundant except here in my collection of old buckets and other containers scattered about the back patio.
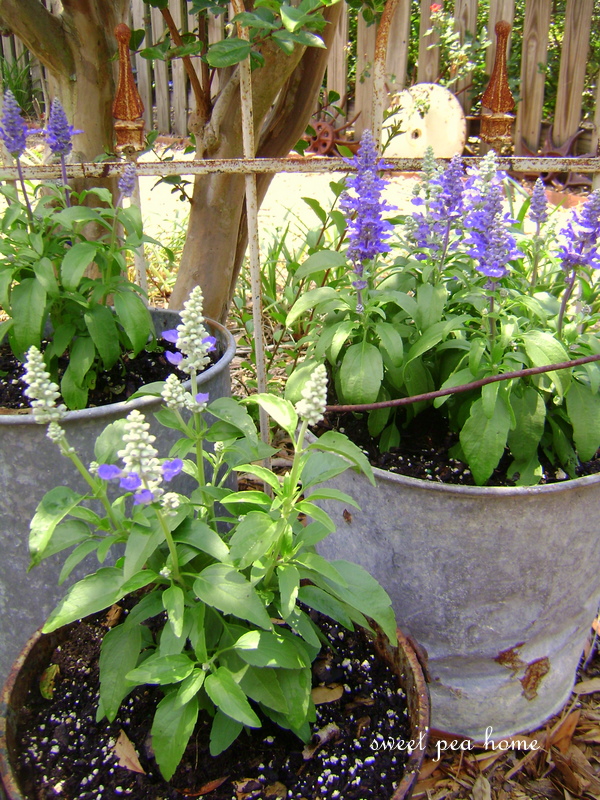

These blue salvias remind me so much of lavender, which does not do well in our normally wet climate.

They start out with buds that are white...


And then, they explode into these gorgeous blue blossoms. I've been experimenting with soft focus, hope you appreciate the effect...


Scaveola in two shades of purple make a pretty showing in my old triple sink.


Purple cat's whiskers in an old cast iron kettle frame the garden cottage in the background.


Oh and an update on mother dove. Still on the nest. Things are looking good.

  • Digg
  • Del.icio.us
  • StumbleUpon
  • Reddit
  • RSS

I NEED TO MAKE A DECISION

And it’s a difficult one…sales have been getting less and less on my website and it’s getting more difficult to make the decision to close it. It’s getting so I don’t have enough in PayPal to make the monthly payment and when you start putting your own money in to cover it – it’s time to think differently.

So…do I hang on for another month or just bite the bullet now and get it over with.

But I do have a question…if I close my website, I would like to sell a few items on a Selling Blog but I don’t know how to get the BUY NOW button on and link back to PayPal.
My webhost designer did all that for me so I’m at a loss as how to do it.

Now I have my patterns on my website but they are also on the two Pattern sites so that won’t hurt anything (sell from those two anyway – none from mine…lol)

And I’m going to ask a favor if I do get a Selling Blog…
Being I’ve tried with all my might to promote all the wonderful selling blogs out there…I’m asking Would you all please help me and put my Selling Blog on your blogs sidebar if I start one????
I’m asking anyone and everyone EVEN IF YOU DON’T HAVE A SELLING BLOG…If I do this I need all the promotion I can get.

So that’s my dilemma right now…that and that I CAN’T leave comments on your blogs. Blogger is being a BUGGER again and it just keeps wanting me to sign in…and I’ve been signed in!!!

Hope to hear from you with some suggestions here on my website…what would you do?

  • Digg
  • Del.icio.us
  • StumbleUpon
  • Reddit
  • RSS

Harvest Salad

After last week's BBQ Chicken Salad I had about half a huge container of mixed greens leftover, as well as blue cheese and peach preserves. What better to make with it then another arranged salad, this time a Harvest Salad.


I made the dressing with some of the leftover peach preserves from the previous salad since we already had it on hand. It was delicious but I know the raspberry would also be wonderful. I think this salad will be making a regular appearance on our table. I love the combination of salty, sweet and tangy from the various ingredients.

Harvest Salad
Recipe from Allrecipes.com

1/2 cup chopped walnuts
Mixed greens, baby spinach or arugula
1/2 cup dried cranberries
1/2 cup crumbled blue cheese
2 tomatoes, chopped
1 avocado, peeled, pitted and diced
1/2 red onion, thinly sliced
2 tablespoons red raspberry jam (peach also works well)
2 tablespoons red wine vinegar
1/3 cup olive oil
Salt and pepper, to taste

Preheat oven to 375 degrees. Arrange walnuts in a single layer on a baking sheet. Toast in oven for 5 minutes, or until nuts begin to brown.

Arrange the greens, walnuts, cranberries, blue cheese, tomatoes, avocado, and red onion on a plate.

In a small bowl, whisk together jam, vinegar, oil, pepper, and salt. Pour over the salad just before serving, and toss to coat.

  • Digg
  • Del.icio.us
  • StumbleUpon
  • Reddit
  • RSS

Mini Plank Wood Frame

Did you go check out my guest post over at Chicks Dig Deals last week? I show you an easy tutorial on how to make a fun plank wood frame.


I enjoyed it so much, I made a mini version to share with you today.


I cut 3 equal length 1x3's that I already had in my wood stash. Before I assembled the frame, I went ahead and painted them the colors of my choice. I used cream and seaside.


After they were dry, I attached all 3 pieces from the back with 2 pieces of lathe. I screwed them into each board to properly secure.


 I sanded down the edges and all over for the nice distressed look. I then applied Early American MinWax Stain to richin' up the color a little.


I painted a clothespin black then I applied a small piece of scrapbook paper to the front with modge podge. When it was dry, I sanded the edges and used some ink to darken the edges.

I then attached a clothespin to the middle piece of plank with a screw. There was already a hole in the actual clothespin. If you find that difficult, then Gorilla Glue will work good, too.


And now I have a fun mini plank frame to display one of my favorite photos from Summerstead. It's actually a postcard that she sent to me when I won her FAB giveaway awhile back. I just love Heather's photography. And this simple chair just makes me smile.


Thanks for stopping by today!

Linking up HERE

The Lettered Cottage


  • Digg
  • Del.icio.us
  • StumbleUpon
  • Reddit
  • RSS

Asparagus Carbonara

I've been having a love affair with asparagus lately, so when I saw this recipe for Pasta with Asparagus, Bacon, and Egg I couldn't wait to try it.


The more I thought about it, the more I realized how much the recipe reminded me of carbonara, which if you've read this blog for any length of time you'll know is my all-time favorite pasta dish. I decided to combine the two recipes, subbing the asparagus for the onion in the original recipe. The result was a delicious and beautiful spring dish that feels healthier because of the beautiful, crisp, green asparagus.


Asparagus Carbonara
Recipes from The Local Cook and Nigella Lawson

4 ounces bacon, chopped
1 1/2 lb asparagus, trimmed and cut into 2 inch pieces
Splash of vermouth
8 ounces short-cut pasta
2 eggs
Splash of heavy cream
1/2 cup Parmesan cheese (freshly grated)
salt and pepper to taste
Freshly ground nutmeg

Bring a large pot of water to boil and salt it. Cook pasta according to package directions, drain and set aside.

In a large skillet, cook the bacon over medium heat until brown. Add the asparagus and cook to desired doneness (5-10 minutes). Once asparagus is cooked, add the vermouth and let it bubble so that, after a few minutes, you have a small amount of salty winey syrup left. Add the drained pasta to the pan and toss to coat the pasta with the winey syrup. Take the pan off the heat.

In a bowl beat together the eggs, Parmesan, cream, and pepper. Add the mixture to the pan, swiftly tossing everything to mix. Top with more grated cheese, if desired.

  • Digg
  • Del.icio.us
  • StumbleUpon
  • Reddit
  • RSS

When white turns into gold.

socks1

I know it’s just one among thousands of sock systems employed by large families far and near.  But this is the system I began when our children were just wee bitty, and it’s the one we still use today. 

socks2

Like any good system, it’s simple so it works!

socks6

It’s no exaggeration to say that these Gold Toe brand socks have changed my life.  No more sorting or stacking or looking for pairs.  When I pull out a sock from the dryer, I throw it in the sock bin and call it a day.  The gray differentiates the boys from the girls.  The stripes differentiate size.

laundrybins

When my children need socks, they simply find the appropriate striped sock x 2. 

socks5

Gold Toe brand socks can be found in many stores, but I buy ours at Target.  If they ever discontinue them I think I’ll cry.

  • Digg
  • Del.icio.us
  • StumbleUpon
  • Reddit
  • RSS

My 50 cent stool

I bought this wonderful already distressed stool at a garage sale for 50 cents last fall. Don't know if it is old or was put together with old wood, but I still snagged it up for that price!

The only problem was that I didn't like the green. It was like minty sea green. I even kept it outside all winter to see if the green would distress more...but I still wasn't in love with it.  


After cleaning it up, I used some leftover cream paint and 'dry brushed' the stool. I purposely left some of the old wood and green paint peeking through. I didn't want to cover up all the wonderful crackle from the previous layers of paint.

It was a little too white...so I added some Early American MinWax stain to tone it down a bit. :)


Now I really love it.


It's tall and sturdy so it makes a wonderful stepping stool as well for my 3 year old. :)


Look at that beautiful crackle.


Not bad for 50 cents! I love finds like this!


Linking up HERE

  • Digg
  • Del.icio.us
  • StumbleUpon
  • Reddit
  • RSS
Related Posts Plugin for WordPress, Blogger...